Why would I want to build SimulationCraft myself if I can just use Raidbots? In most cases Raidbots will do everything that you need. Not everyone has the means to pay for Raidbots so being able to run your simulations locally is a big advantage. In particular cases, such as Alpha/Beta cycles, there is not a way to utilize Raidbots.
Today I am going to show you how you can build SimulationCraft from source. You do not have to be a programmer to build SimulationCraft on your own. If you have basic computer knowledge and can follow along with my instructions, you should not encounter much resistance.
Please remember that Shadowlands is still in Beta and SimulationCraft is not complete. You should not take any results as 100% accurate. The main goal is to help people get their hands on SimulationCraft to help test the APL or spot any errors they might see. The SimulationCraft Dev team does have a SimulationCraft 9.0 TODO list that will let you know the current implementation status.
This guide is intended for Windows 10. If you are on a previous version of Windows, you should really consider upgrading. If you are on Mac or Linux, you can refer to the official “HowToBuild” page on the SimulationCraft Wiki. You will need about ~15GB of free space.
1. Download and install Git. You do not need to modify any of the installation options.
2. Download and install TortiseGit. Use the link right below “for 64-bit Windows”. On the last page on the install you can uncheck the box that says, “Run first start wizard”.
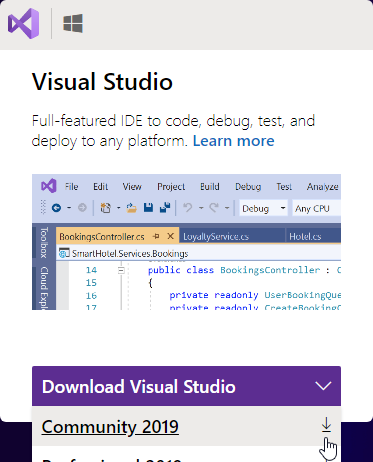
3. Download and run Visual Studio Community 2019.
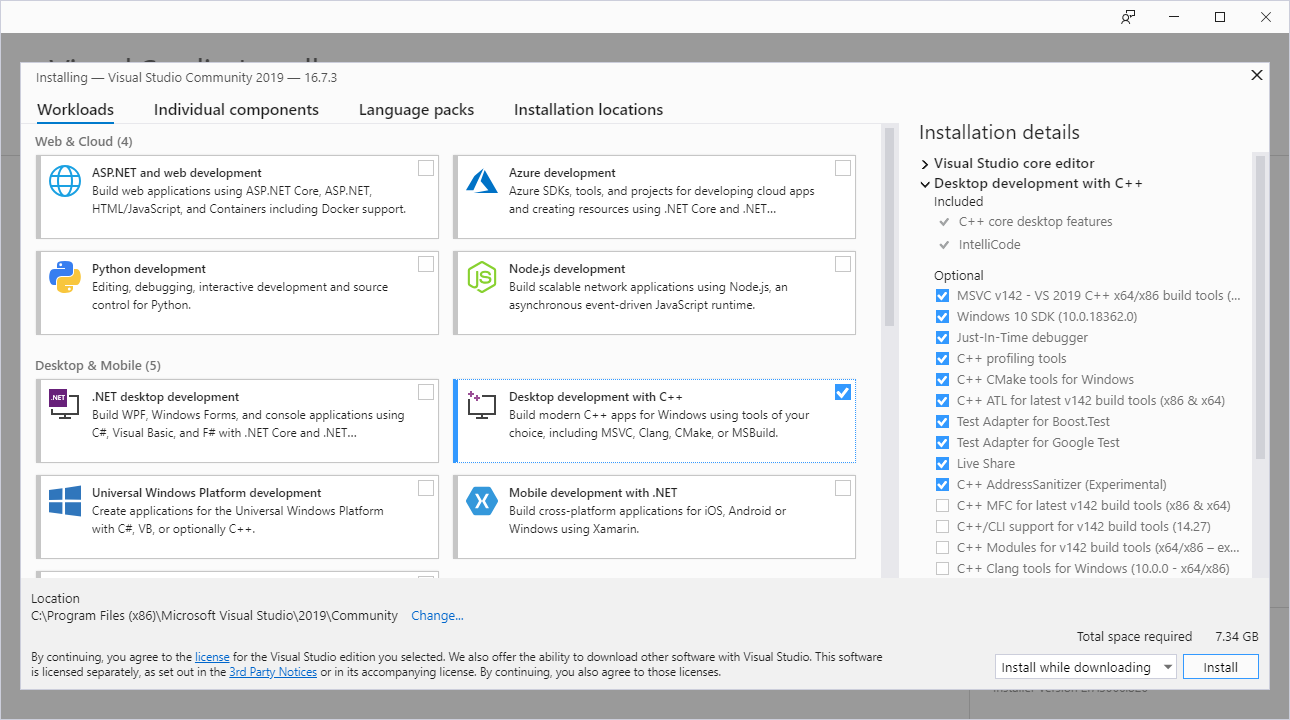
4. Make sure to select “Desktop development with C++” before pressing “Install”. This is a large download and can take some time based on your internet connection speed.
5. After the install is complete you can safely close both Visual Studio windows that are open.
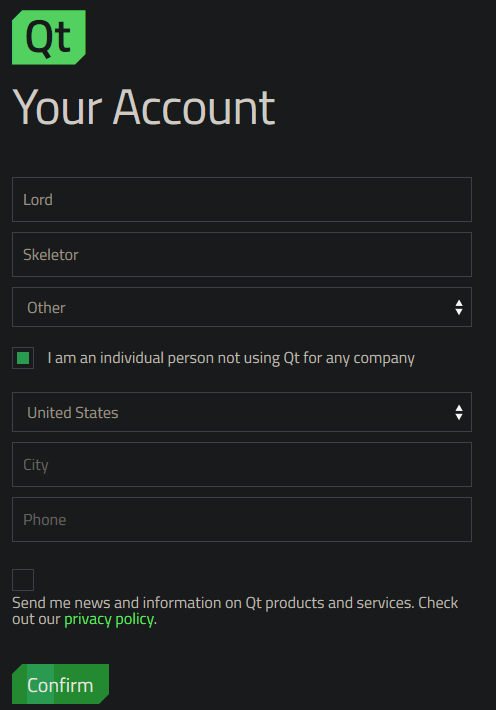
6. Download and run Qt. You will be required to make and account during the install process. After clicking on the link in your email you need to fill out a First and Last name, industry, check “I am an individual person not using Qt for any company”, select your Country, and press confirm. You do not need to fill out a city and Phone number. Press “Next” until you reach “Select Components”.
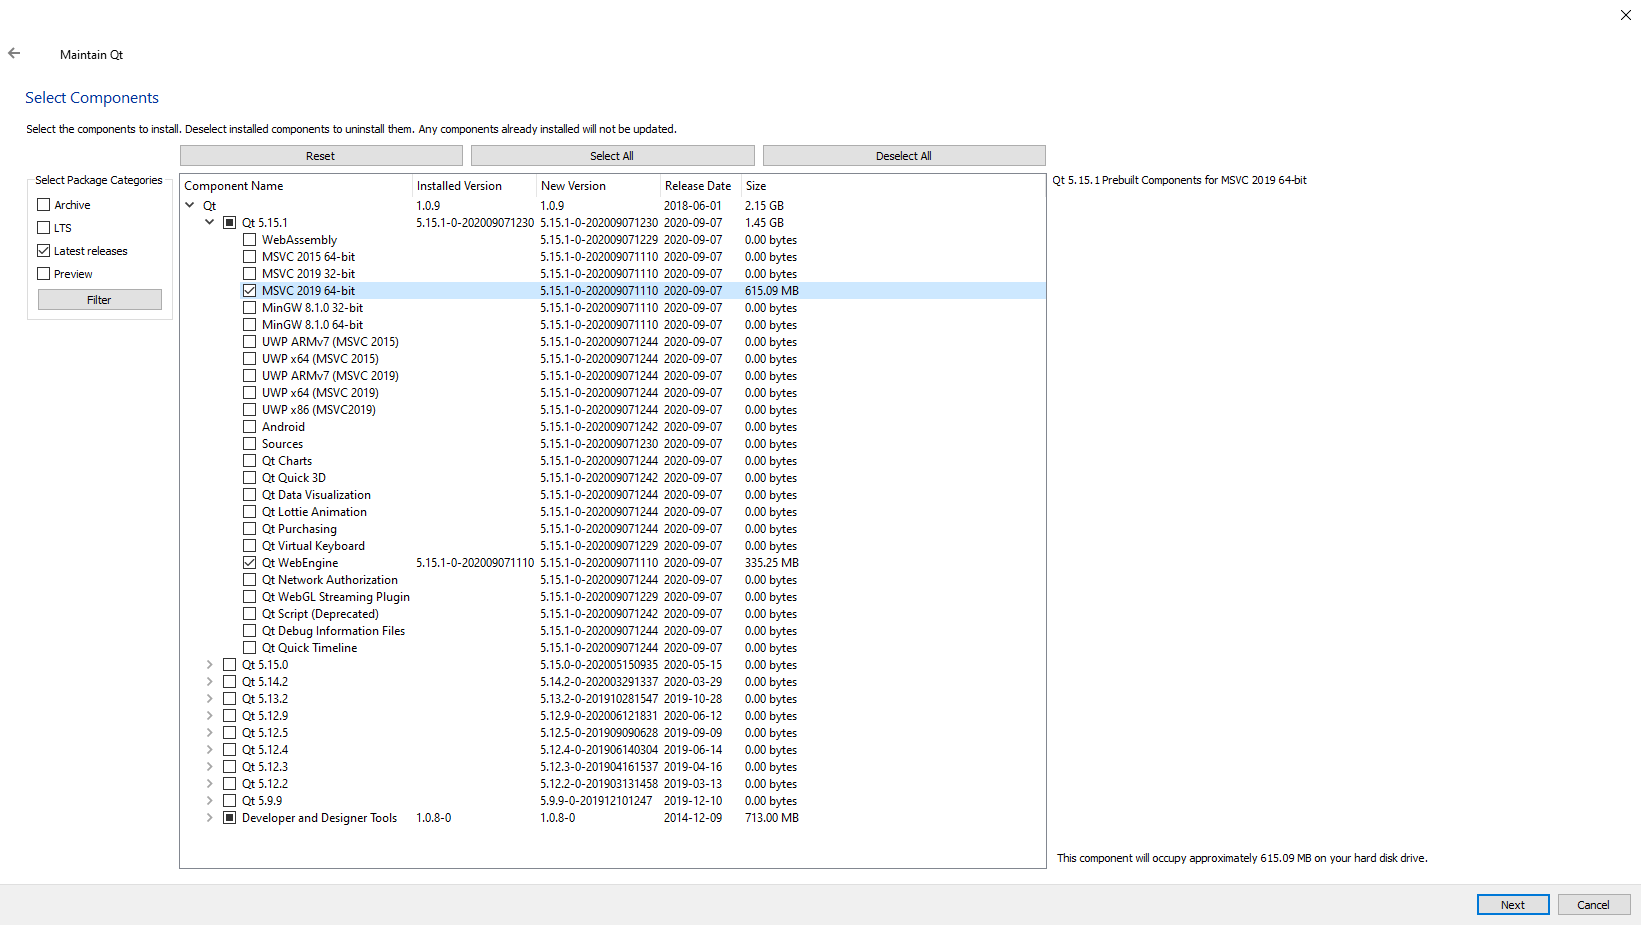
10. Expand the list next to the latest Qt version (5.15.1 as of writing) and select “MSVC 2019 64-bit”, and “Qt WebEngine”.
12. Press “Next” and wait for the install to finish. This is a slow process.
13. Uncheck “Launch Qt Creator” once the install is complete.
14. Create a folder that will contain the SimulationCraft source code. Mine is located on my Desktop and named SimC.
15. Open the SimulationCraft Github.
16. The default branch is “shadowlands” as of writing. Click on the green “Code” button and then click on the clipboard icon underneath “Clone with HTTPS” to copy the link to your clipboard.

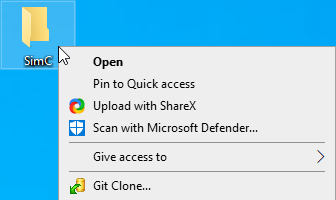
17. Right click on your “SimC” folder and select “Git Clone…”
18. The previously copied SimulationCraft link should automatically be filled next to "URL:". If it is not paste it inside this box. Feel free to edit the “Directory:” and remove the “simc” from the end.
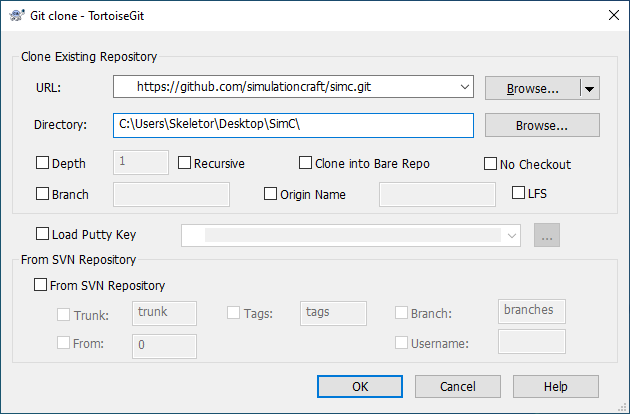
19. Press “OK” and it will start to download SimulationCraft. This may take a few minutes.
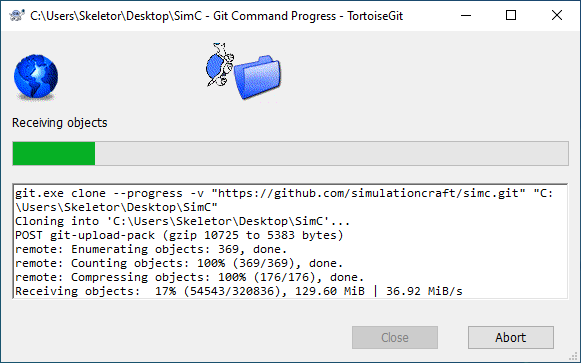
20. Once it is complete press “Close”.
21. Locate your msvc2019_64\bin folder inside your Qt install directory. If you left the install location default this will be “C:\Qt\VERSIONNUMBER\msvc2019_64\bin”. For this example, it would be “C:\Qt\5.15.1\msvc2019_64\bin”. Copy the full directory to your clipboard.
22. Type “path” in your Start Menu and select “Edit the system environment variables.
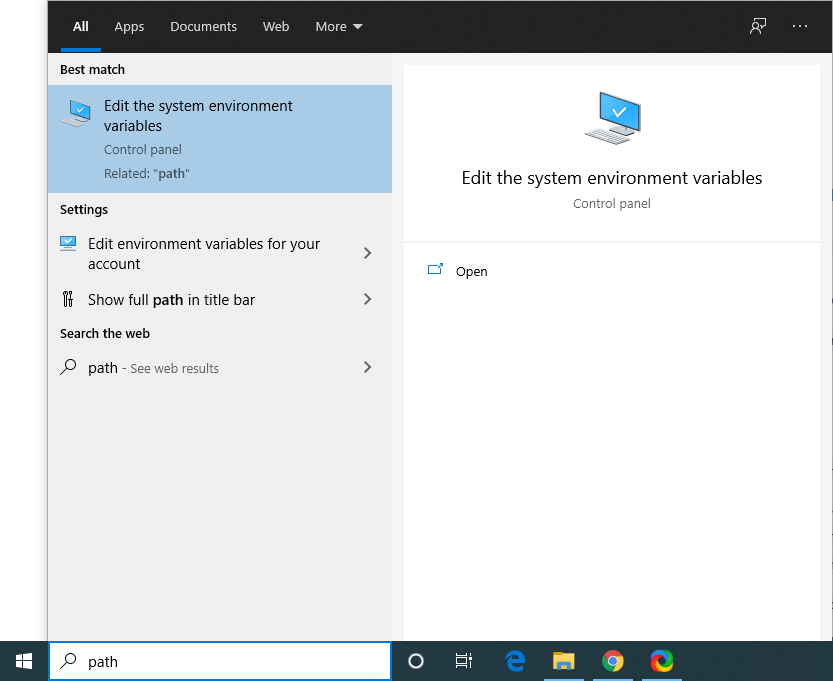
23. On the “System Properties” window that opens up select “Environment Variables” at the bottom.

24. Select “Path” under “User variables for YOURUSERNAME” and select “Edit". You can use the “Path” under “System Variables” if you have multiple user accounts you want to use this on.
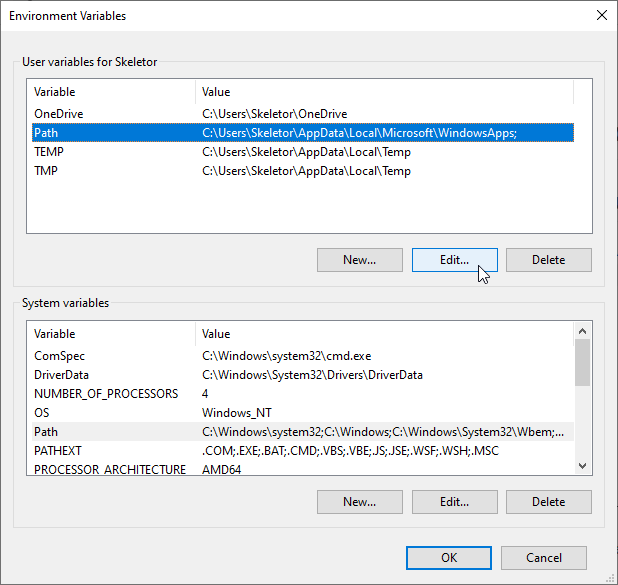
25. Click “Edit” and paste your msvc2019_64\bin directory from your clipboard.
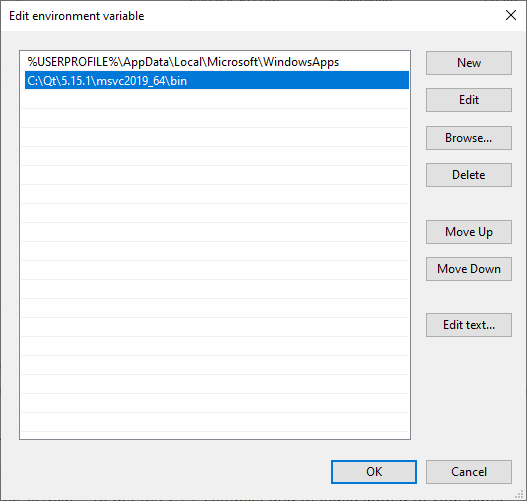
26. Press “OK” on the “Edit environment variable” window and close the other 2 windows.
27. Open a Command Prompt window. Type “cmd” without the quotes in your start menu and choose the black box that says Command Prompt.
28. Copy and paste the following line into your command Prompt window including the quotes.
"C:\Program Files (x86)\Microsoft Visual Studio\2019\Community\VC\Auxiliary\Build\vcvars64.bat"29. The output should be like the image below.
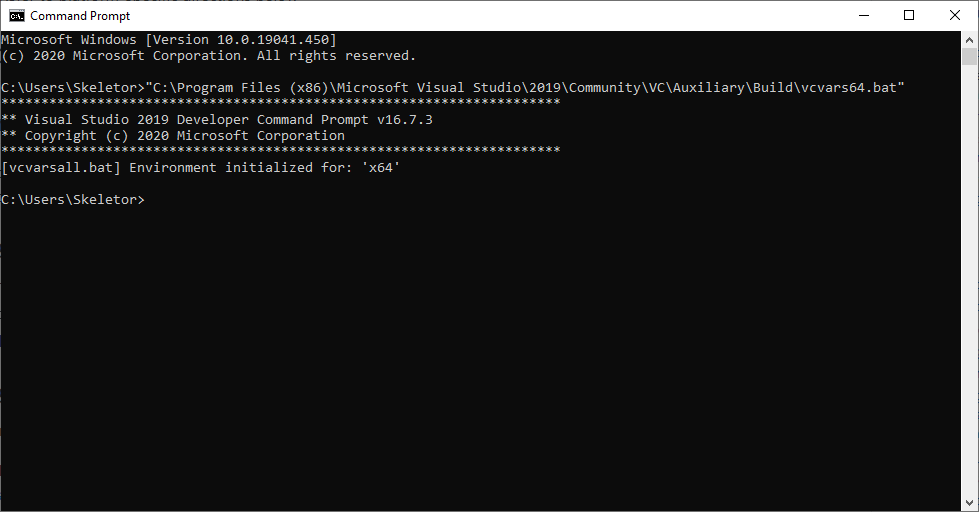
30. Next you need to navigate to your SimC folder created earlier. You can do this in the same Command Prompt window by using “cd” and entering the location of your SimC folder such as “cd Desktop\SimC” and pressing Enter.
31. Paste the following line into your Command Prompt windows and press Enter.
qmake -r -tp vc -spec win32-msvc simulationcraft.pro32. The output should be similar to what is below.
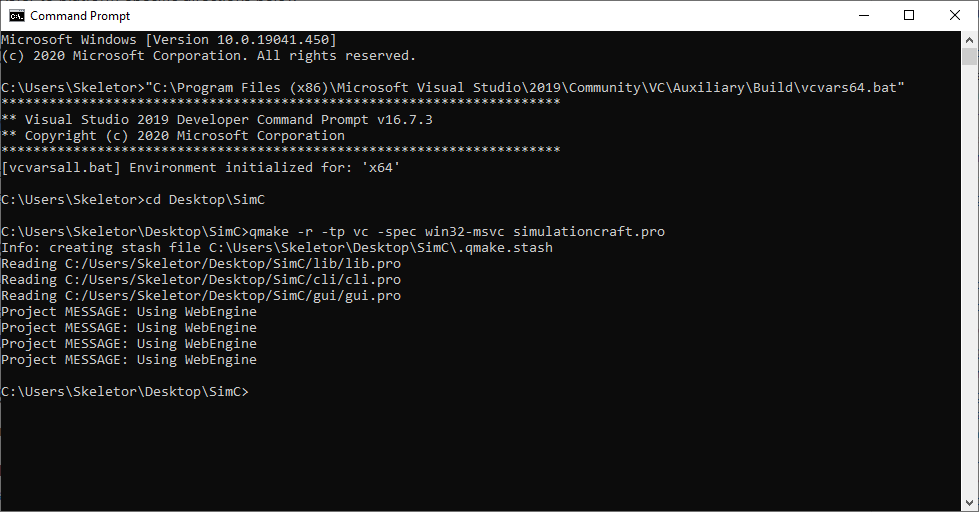
33. Open your SimC folder and locate “simulationcraft.sln”. Double click to launch.
34. If you are asked, “How do you want to open this file?” select “Visual Studio 2019”.
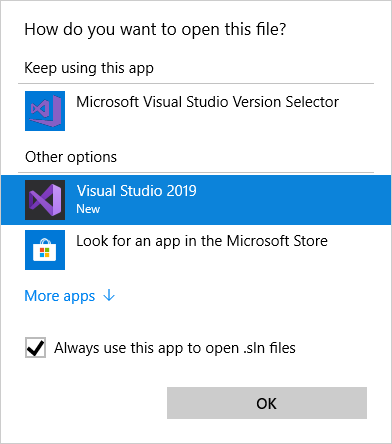
35. If you receive an error that states “Error HRESULT E_FAIL has been returned from a call to a COM component.” Close Visual Studio 2019 and do not save any changes if it asks you too. Open your simulationcraft.sln file once more and it should load properly.
36. Near the top left click on the drop-down arrow next to “Debug” and choose “Release”

37. On the top menu bar choose “Build” and select “Build Solution”.
38. This will start the build process which can take some time to run depending on your CPU. Once it is complete the “Output” section at the bottom should “Build: 3 succeeded” like below.

39. You will find your newly complied SimulationCraft in your SimC directory.
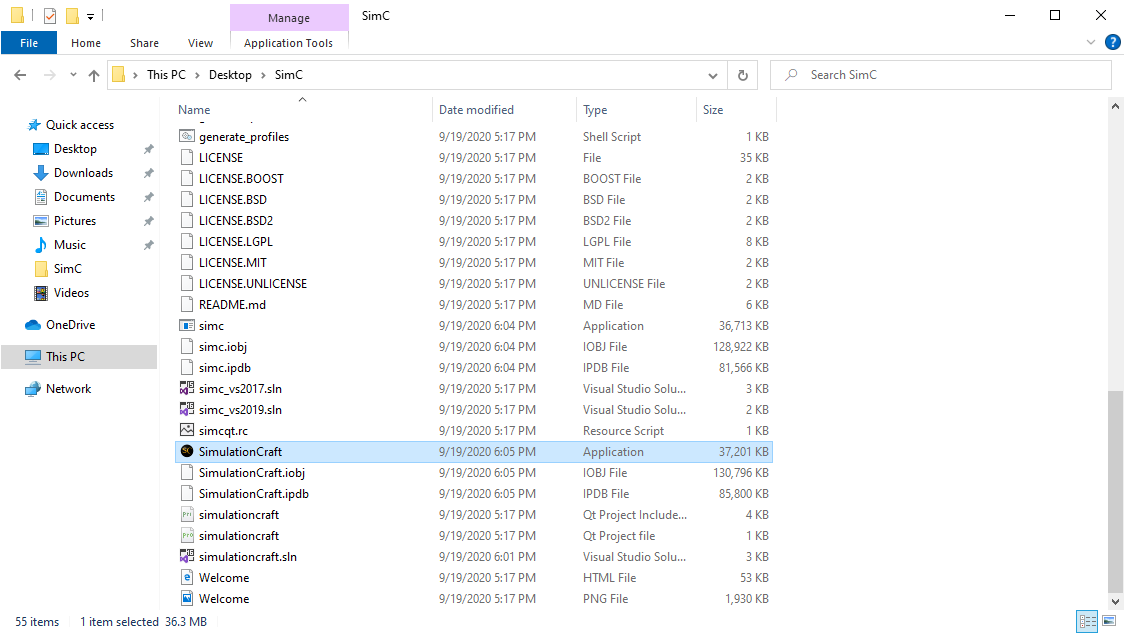
40. Double click to launch and you can now use SimulationCraft as normal.
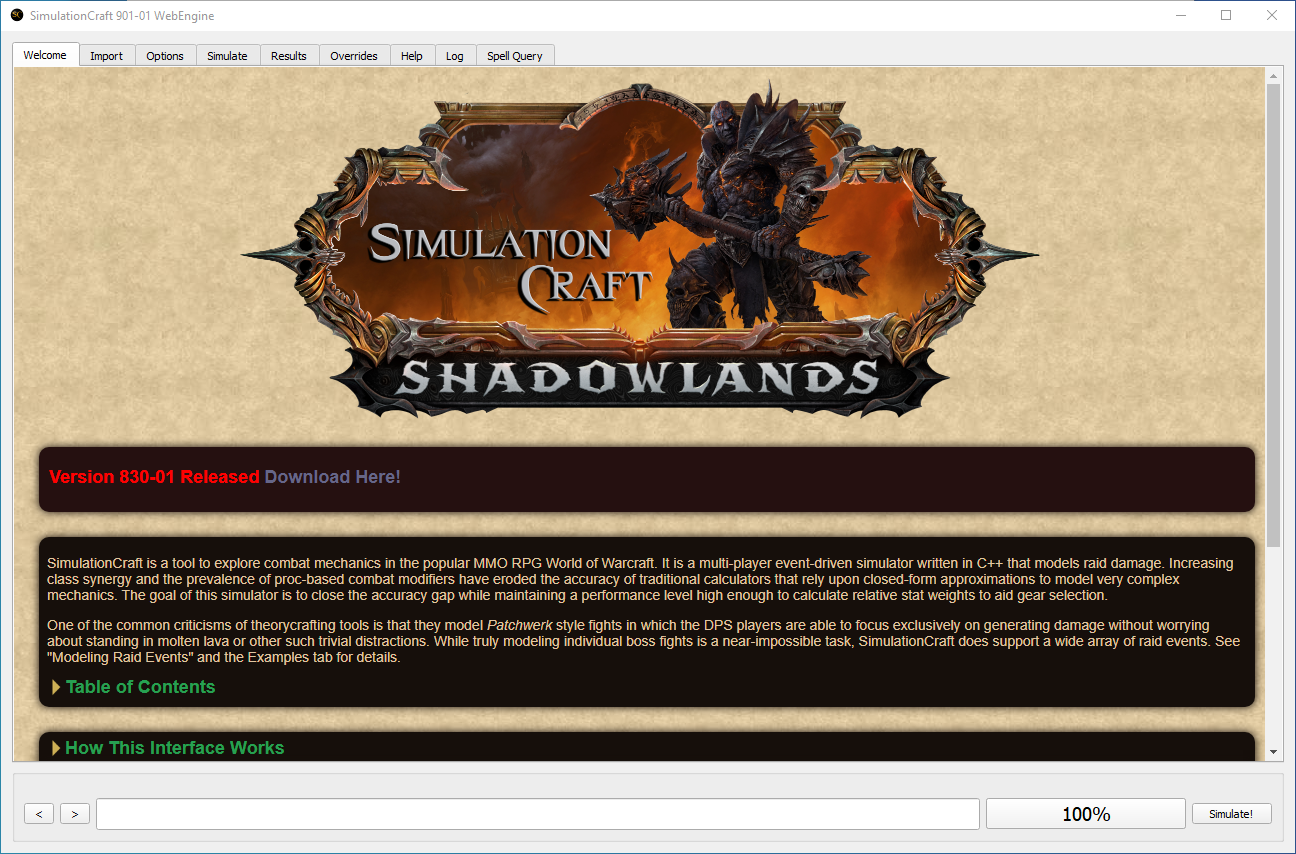
You have now successfully built SimulationCraft! When you want to update SimulationCraft in the future it will be a much faster process. Simply right click on your SimC folder and select “Git Sync…”
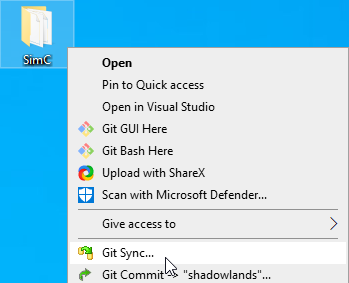
Then select “Pull” and it will download any changes that you are missing. Open the simulationcraft.sln inside your SimC directory and Build it again.
You can find an updated APL from Solsacra at this link. You will need to add this to your profile as your sim will most likely fail without it. Start at the line "actions.precombat=flask" and copy down to the end. You do not need the information above it.

